
Upgrades and 'improvements'
Mod-Wise two speed fan controller kit installation
Disclaimer The TVR Car Club will not accept responsibility for any damage caused to any vehicle as a result of using this information.
Purchased from Mod-Wise.The standard TVR Chimaera fans are controlled by an otter-switch mounted in the swirl tank. The switch is factory set to close at one temperature (usually around 92 degrees) and re-open at a lower temperature (around 88 degrees). This system is more than capable of regulating the engine's temperature under normal conditions.
My car has never had any problems with the cooling system, even in stationary traffic the gauge indicates between 85 and 95 degrees. However I'm planning a trip to Europe at the height of summer and so I figure that this system can only help the cooling system and give me some piece of mind.
I'm also planning to add a fan override switch and indicator LED in the future.
However there are a couple of flaws in this system. Firstly the otter switches have been known to fail, either latching permanently or not at all (which could cause the car to over heat). Also the otter switch depends on the current engine temperature, thus it doesn't switch until the engine is already hot. Lastly it has been known for the current drawn as the fans start up to overload the standard fuses.
The two-speed fan kit addresses these limitations and offers some other benefits. Firstly the kit uses temperature probes which are much more reliable than the traditional otter-switch. Also the kit allows you to vary the temperature at which the fans kick in.
As the name suggests the kit controls the fans at two speeds. You can define a temperature at which to bring the fans on at half speed (this is achieved by putting the fans in series). There are many advantages to this, it means less start-up load on the fuse and it helps to reduce the temperature under the bonnet.
Once a second (configurable) temperature is reached the fans are switched to full speed. Finally, a connection is made to the car's otter switch as a backup, thus regardless of the temperature of the probes if the otter-switch says the fans should be on they will be.
The Installation
The first thing to do was to clean up the fan connections, pulling apart the connectors revealed corrosion which would inhibit the flow of power. I cleaned these up by scraping with a screwdriver and polishing with some wet-and-dry paper.
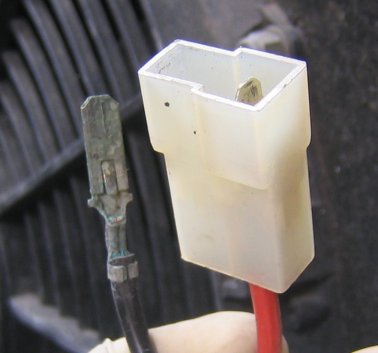
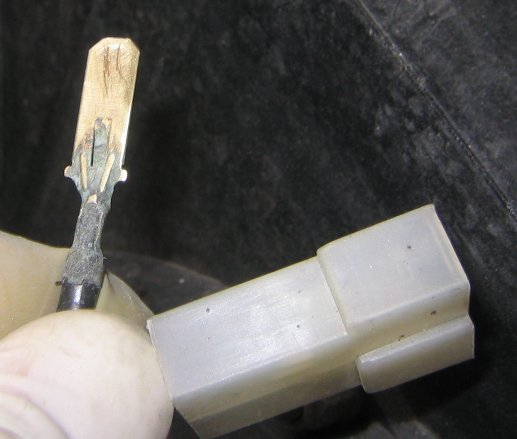
Cleaning the sockets was much harder, I think I'll replace them at some point to ensure a good connection.
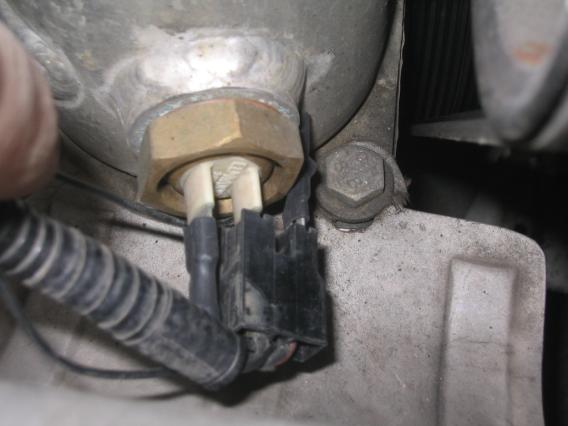
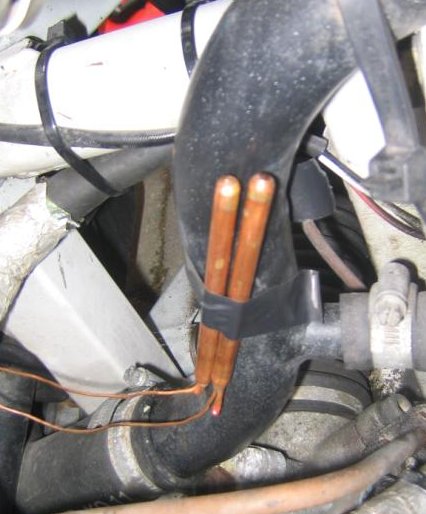
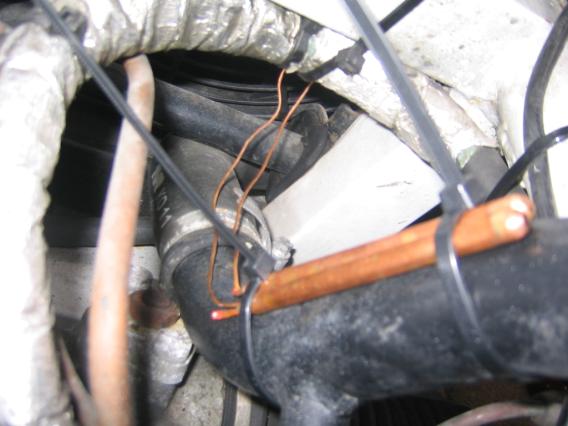
The next thing to do was to make the connection to the otter-switch. There are two black wires on the kit with male and female spade connectors. The male connection needs to connect to the coloured (in my case black with red trace) wire on the otter switch connector. The female connection needs to go onto the otter switch itself. The black otter switch wire remains on the switch.
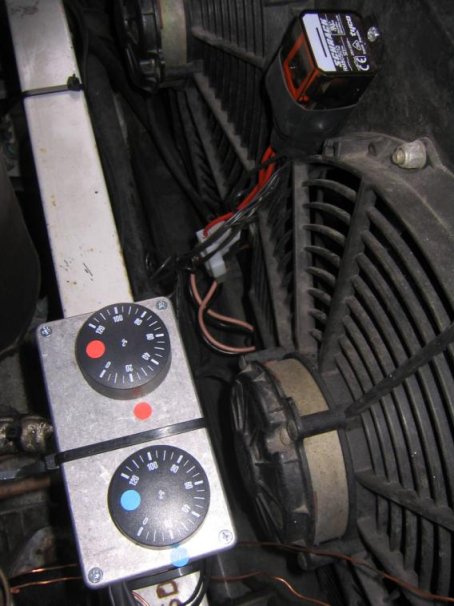
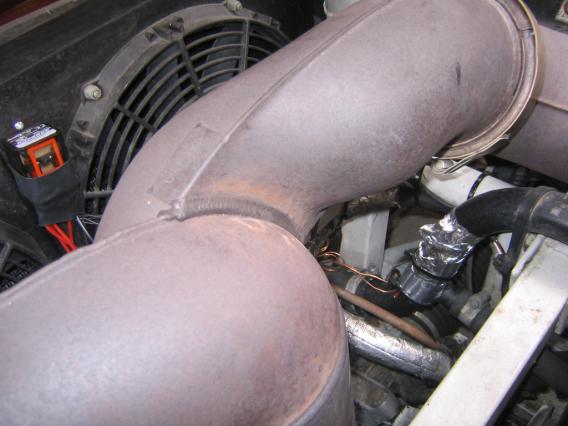
The next step was to mount the actual control box. It needs to be kept somewhere dry but not too close to the heat of the exhaust manifold. I've placed mine onto the cross member, over the VIN number. I also had to mount the main relay, I used a very small self-tapping screw to attach it to the fan surround:
The next thing to do was to make the connection to the otter-switch. There are two black wires on the kit with male and female spade connectors. The male connection needs to connect to the coloured (in my case black with red trace) wire on the otter switch connector. The female connection needs to go onto the otter switch itself. The black otter switch wire remains on the switch.
The next step was to mount the actual control box. It needs to be kept somewhere dry but not too close to the heat of the exhaust manifold. I've placed mine onto the cross member, over the VIN number. I also had to mount the main relay, I used a very small self-tapping screw to attach it to the fan surround:
Testing
There were 3 main tests to do:
Low speed operation - Put both control dials to a high temperature (ie. 90 degrees or so). Then switch on the ignition, the fans should not be running. Then slowly lower the first (Blue) dial, once the ambient temperature is reached both fans should run at half speed.
High speed operation - Next lower the second dial to the ambient temperature. The relay should click and the fans should run at full speed. Once this is done bring the dials back up to switch the fans off.
Otter Switch Override - I simulated otter-switch operation by shorting the terminals with a screwdriver. This correctly caused the fans to immediately run at full speed.
Setting the dials
This is largely up to the owner but for reference I set the low speed (blue) dial to 75 degrees and the high speed (red) dial at 85 degrees.